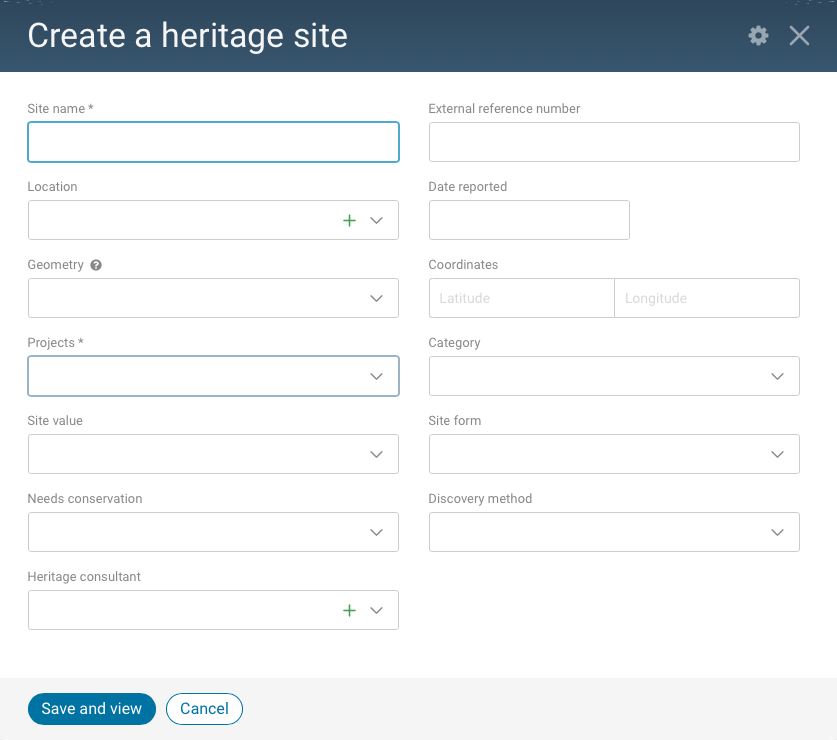
The first step for managing your Heritage Sites is to first create them.
1. Click on the Land Access icon and then, on Heritage sites.
2. Click on the Create button in the top left corner.
3. In the form that will appear, fill-out all the information you require to create the Site.
Note that if using the Geometry drop down menu, the Geometry must have already been created in the Configuration menu prior to creating the Heritage Site in Land Access. Instead of Geometry you can also use Latitude and Longitude Coordinates.

The fields completed here will be part of the General Information and the Assessment tabs of the heritage site record.
4. Click Save and view if you wish to view the newly created record. Otherwise, click Save.
***PRO TIP: If you must create more than one site in a sitting, check the box Add another next to the save button before saving your first. It will save the heritage site that you created and the system will remain on the creation form so you don't have to repeat all the steps again.