Creating a custom profile will allow you to define all permissions and assign access rights to your users in one step. This will give you control over access to your data. You will be able to consider these changes as a result of the individual and their position, department and employment status.
For example, if a new user joins the "Land management team", they may need full access to enter and export data. But for the "Social investment" module, the person may be given "Read only" status.
Follow the steps below:
1. After choosing "User profiles" from the main menu, click on the "Create" button:

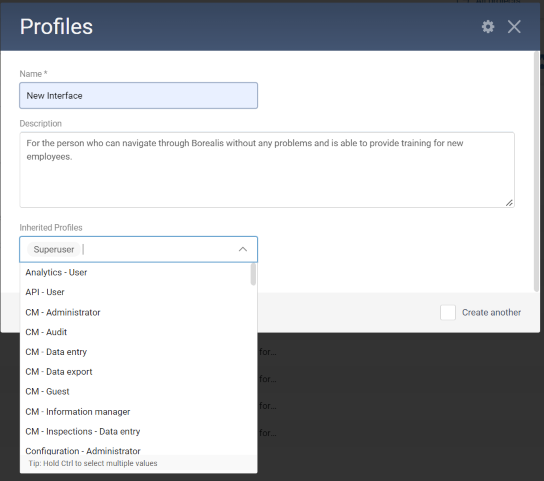
2. Choose a title that matches a term used in your organization and add a description. The "Inherited profiles" field determines the permission that will be granted to users who will be associated with the profile. The permissions are added together. So each value selected in the "Inherited profiles" drop-down menu will give additional permission to the new custom profile.

3. Complete and "Save".
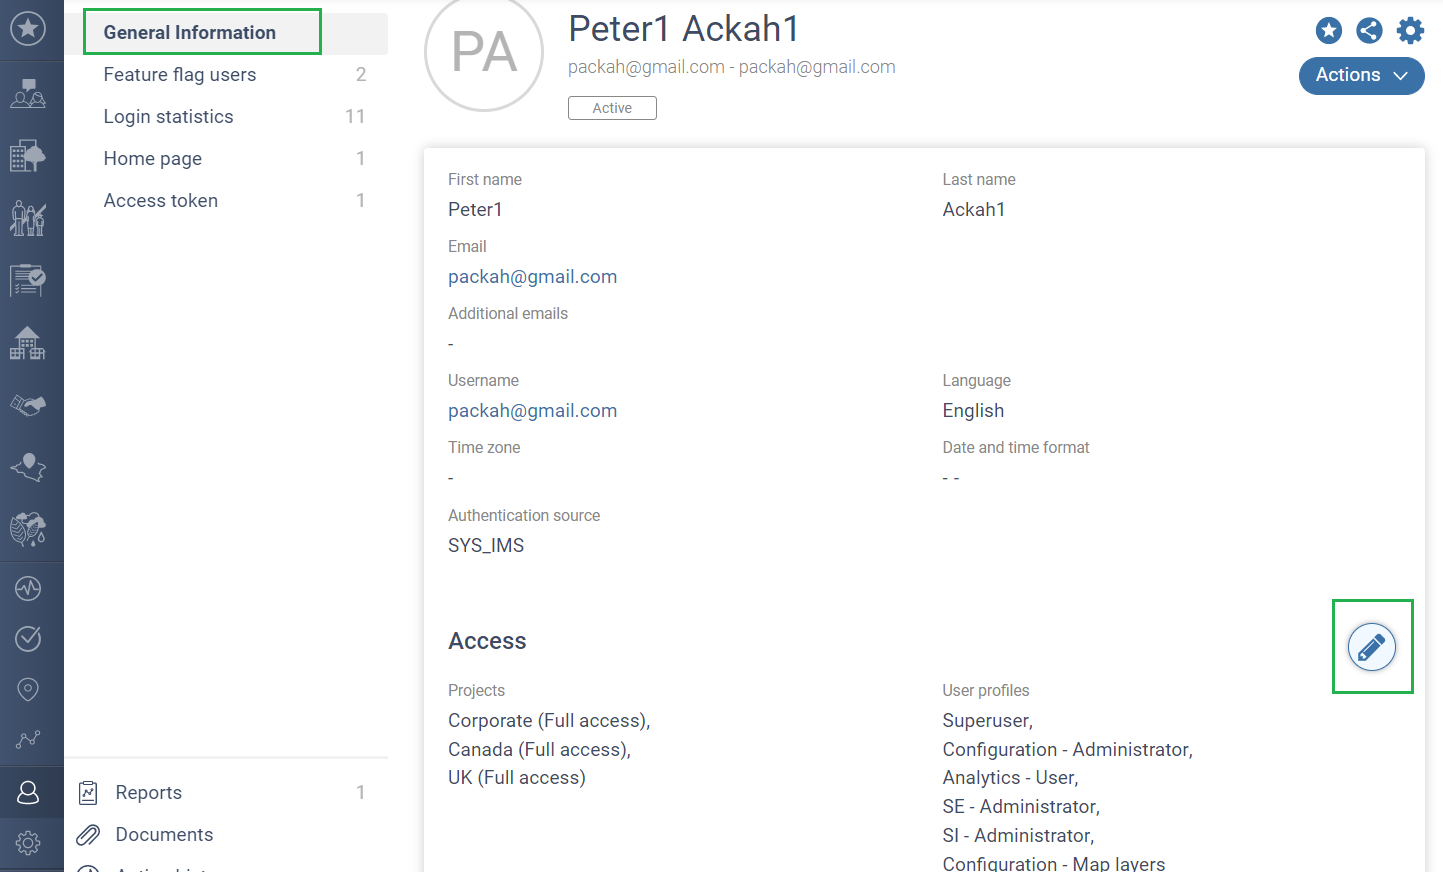
4. In order to assign this profile to a user, go to the user's file and go to the bottom of the "Access" section. Use the pencil to make changes and "Save":

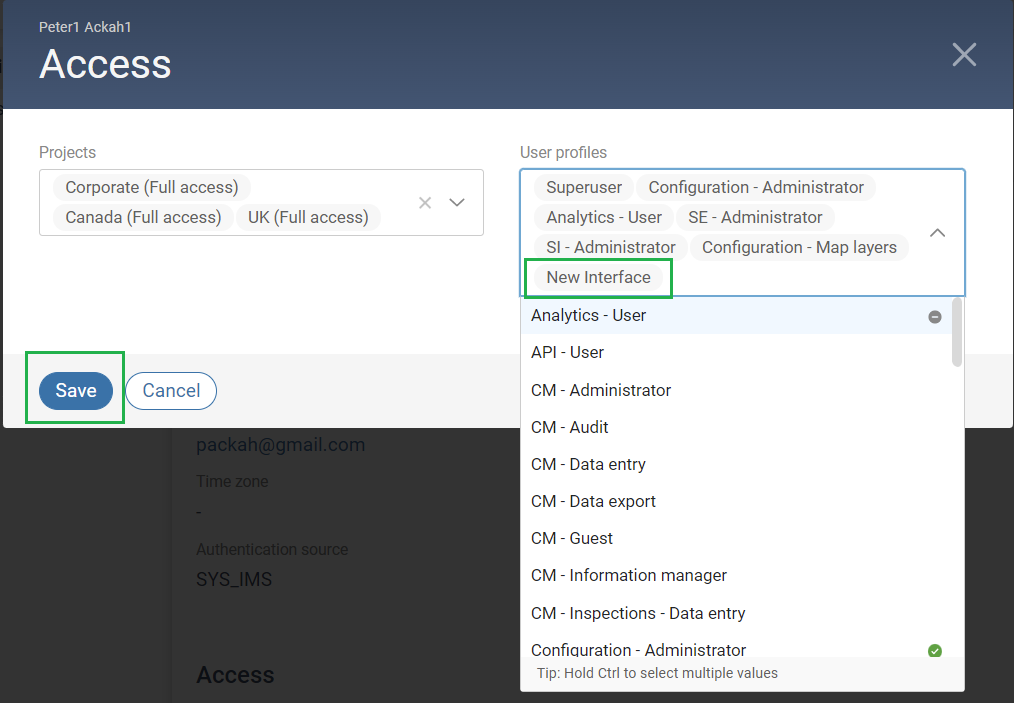
5. Choose the "User profile" and "Save":
